
The Cartographer's Annual Vol 2
May ’08
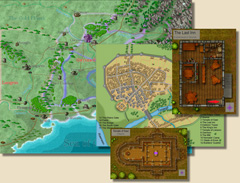
In May we'll take a look at something a little different, not a new style or a new set of symbols, but how to connect all your different maps together to create a virtual atlas.
We at Profantasy used the option to link maps to each other in a number of products, namely the Forgotten Realms Interactive AtlasTM, the World War II Atlas, and the Source Maps series of products. We'll show you how to setup some of the special linking that has been used in those.
Besides the detailed mapping guide, the May issue contains a number of tools for linking maps (menus, macros, drawing tools, etc.) and a mini-collection of linked maps consisting of last months's example city and three new maps (1 overland, 2 floorplans).
The technique pack Creating An Interactive Atlas includes
- 1 Example Regional Map "Gwynneth"
- 1 Example City Map "Gwynnin" (edited version of last month's city map)
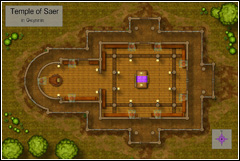
- 2 Example Floorplans
- 1 5-page pdf Mapping Guide
- 2 drawing tools
- 1 CC3 menu addition
- 12 new or updated CC3 macros
- 8 bitmap menu icons